Thursday, 24 February 2011

Thin crust pizza for weekdays


For the record, I only ate half of this! Plus cold homemade pizza is great as lunchbox-fodder the next day.
Whoops - it's been a while! January and February got the better of me and combined with getting a bit cooked-out for my boyfriend's birthday and just trying to get through that last dark shivery part of winter I failed completely to update this. And I've had the pictures all along. But now look what it looked like over Camden when I got home tonight! Light! And sunsets!
This pizza is pretty fantastic stuff in any case. You can easily make this weeknights for supper, you can add whatever toppings you do or don't like, although it's nice with some pepperoni (not very veggie though) and a handful of rocket salad on top with a nice glass of wine on the side. Although don't go too crazy on the toppings, otherwise it doesn't cook properly and stays all soggy in the middle - my boyfriend always finds this out this hard way.

Flat crust pizza (makes 2 large pizzas) 
  • 175ml (3/4 of a cup) of lukewarm water
  • 1/2 tsp yeast
  • 2 cups of plain flour (or strong flour)
  • 1/2 tsp salt 
Plus, a tin of chopped tomatoes and rosemary for a tomato pizza sauce, plus toppings - mozzarella, pepperoni, peppers, onions, tomatoes, capers...
 The secret to this, apparently, is preheating your oven to some insane temperature then getting the pizza in quickly on a very hot baking tray so it crisps up perfectly, but I am nowhere near dextrous enough for that. I do pre-heat very hot, but, I tend to lay my pizza on the back of a tray, then 'decorate' it (hah) carefully before putting in the oven. Basically, step one, pre-heat your oven.

In a bowl, mix the flour and salt. Sometimes I like to try putting dried herbs in at this point - you can experiment as much as you like, it's just dough! If the yeast needs to be activated, stir into the water. Otherwise you can just add the yeast into the flour and mix well. I have spent my entire cooking life up to very recently not using a tbsp/tsp measurer and just kind of winging it, but I have to say this little spoon-device is pretty handy if you're a little on the perfectionist side.
Make a well in the centre of the dry and pour in the water, then use your fingers to mix. When the dough starts to begin to stick together, tip the whole lot onto a well floured surface. Here's how it looks before you tip it out. 

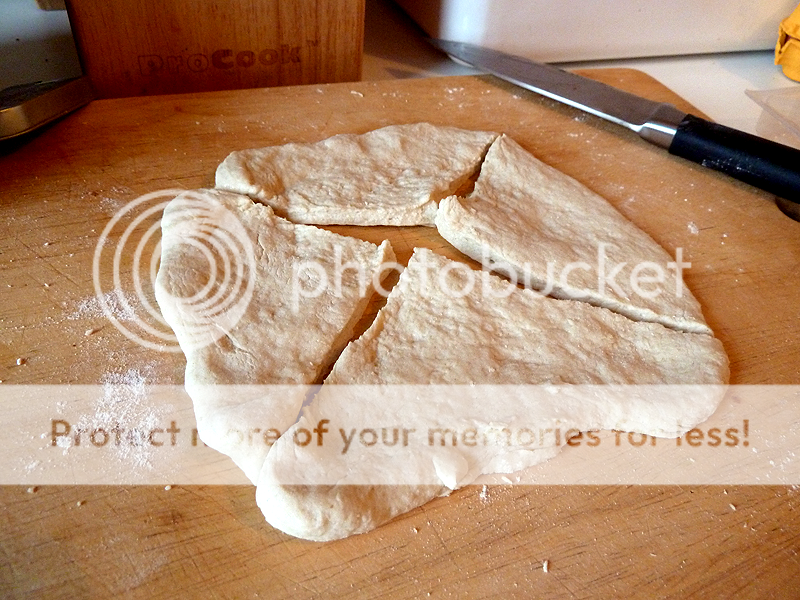
Knead for five minutes or so, the texture will change rather dramatically and get all smooth and tacky and elastic. Then using a chopping knife (I love this part) slice the ball in two. Et voila. Now all you have to do is find a handy method for making it into a nice thin pizza - I find a combo of rolling pin - well floured!! - and using my hands to pull it out is the best way.

At some point, you'll need to make a tomato-sauce to spread on top, so chop two or three cloves garlic or onion, whatever you feel like, and put into a sauce pan. Fry lightly in olive oil, maybe add a bit of rosemary or oregano, and then the chopped tomatoes. Give the sauce a stir, just bring to boiling, then take off the heat. Spread over the two pizza bases. Then add your toppings - leaving off the cheese - and put in the oven for five minutes. 
 This gives the base and toppings a chance to cook. Then after the time is up, remove from oven, add the cheese, and put back in the oven for about ten minutes until it's looking nice and crispy. Yum. If you have the oven space maybe this would be nice for guests, it's always fun letting someone top their own pizza.

Credit where credit is due: The Kitchn

Monday, 10 January 2011

Soda farls (with tomatoes, eggs and bacon, or whatever you like)

Let this be some Monday inspiration for you to carry you through the week to the weekend where you can settle in, have a cup of coffee and weekend papers, with some delicious brunch. 
This is a lovely recipe for soda farls, put up by Niamh, who runs the blog Eat Like a Girl. As soon as I saw this post, I knew I had to make these, not least of all because bread is definitely one of those things which people tend to be extremely wary of, and for a good reason, really. If nothing else, you get all psyched up having decided it's time to do bread, then reading the recipe realise there's about four hours of letting it sit around, while you're standing there in your apron, all ready to go! Plus activating the yeast can be a pain. 
I love Saturday morning breakfast 
My only proper experience of trying to make bread was an overly-spongy, oily foccacia which my boyfriend loved, because anything coated in oil, garlic and rosemary is guaranteed to hit SOME taste buds, but it was hardly a triumph and it took much too long. Boo to that! 
Whereas this recipe doesn't even need yeast! Make the dough, put it into a hot floured frying pan for about eight minutes, and you're done. Hot, fresh bread with your breakfast that 10 minutes prior was a heap of flour. Now that's a sense of smug achievement for you! 
I've included this one here with some roasted tomatoes, which I stuck in the oven as soon as I arrived back from Tesco, even before I started weighing out the flour, plus some scrambled eggs and some bacon. Yum yum.  For two people. 


Soda farls (with tomatoes, eggs and bacon, or whatever you like) 
  • 115g plain flour
  • 1/2 tsp bicarbonate of soda
  • 75mls buttermilk, or 75ml normal milk with a 1/2 tsp of lemon juice
  • Pinch of salt
Before you do anything else, get on your tomatoes. Pre-heat the oven, and cut them in half and sprinkle over a pinch of dark sugar, a pinch of salt, a pinch of pepper, a pinch of oregano and maybe some harissa dry spice rub (that's what the rose-petal looking flakes are in the photograph), if you have it to hand! Put it in the oven on 180C, and keep an eye on it. If it starts to get too dried-out looking, just turn off the oven but leave them inside. They'll stay warm. 

Now onto the farls! Sieve the flour and bicarb into a mixing bowl, and add the salt. Make sure it's combined, then make a well in the centre and gradually add the milk, a little at a time, mixing all the while. You miiiiiight need a little extra splash of milk if it really won't come together at all, but you want it to just about stick into a ball. Knead it very briefly, for 20 seconds or so, then roll into a ball in your hands and put on a floured work-top.
Push the round of dough out into a circle shape about 1cm thick (it will rise when you cook it) and cut into quarters.
Put a frying pan on a medium heat with a sprinkling of flour, and put the farls in, turning occasionally until they're goldeny-brown on each side. Once the farls are in the pan, get your scrambled eggs on (scrambled eggs must be cooked slowly, on a low heat, with butter!) and after a bit, your bacon. At the end, serve all together, with a big mug of black coffee (alright, tea if you must) and the weekend magazines. Then mooch around all day. Perfect!
Lovely smell at this point, as you can imagine! 


Credit where credit is due: Niamh of Eat Like a Girl

Tuesday, 4 January 2011

Sweet potato ratatouille


And I'm back after the Christmas break, having received two wonderful cookbooks which made me desperate to get home and start creating meals again.  And it has been great!

But with Christmas break comes that post-binging guilt, and I find ratatouille is a perfect mix of comfort food while still being healthy. I read something once, complaining about ratatouille - that its very essence is aubergine, so how can you have one without? But sadly for me, I hate aubergine - no amount of pressing or salting or anything can seem to make this vegetarian-staple taste any less revolting and bitter to me. It's a shame as it's also a gorgeous vegetable, and is a lovely shade of purple (I used to dye my hair 'aubergine' when I was 14) but it's just not for me.
No, the main ingredient in this ratatouille is sweet potato. I don't know quite why I avoided the sweet potato for so long, but I did. It is a fabulous vegetable, and especially for these post-Christmas times when you're so hungry after nibbling all day long, but don't want to binge on carbohydrate. It does the job of regular potato, but fills you up nicely while still being a healthy vegetable. The original recipe also calls for butternut squash, but we had sweet potatoes and wanted to use that up. In any case, you can substitute 1/2 a butternut squash for sweet potatoes.


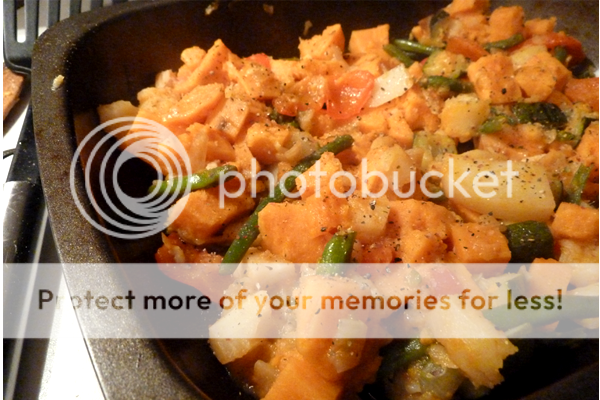
This has a nice amount of veg in it. Just look at that picture. Don't you feel healthier just looking at it? And the best thing about this ratatouille is that it is genuinely delicious. There is no sense of 'eat it up, it's good for you' and that stifled grimace of swallowing down healthy stuff. Right before typing this, me and my boyfriend were picking bits of veg out of the roasting tin to eat cold. It's that tasty. And a little bit of ground rock salt once served pushes it from that over into 'can't stop eating' territory. This recipe is taken largely from Yotam Ottolenghi's marvellous vegetarian cookbook, 'Plenty'.

Sweet potato ratatouille (makes enough for 3)
  • 50ml sunflower oil
  • 1 small onion, diced
  • 3 garlic cloves, sliced
  • 1/2 green chilli 
  • 1 small red pepper, diced
  • 100g french beans/fine beans
  • 1/2 a courgette, diced
  • 1/2 a small potato, peeled and chopped
  • 2 tomatoes, peeled and chopped
  • 1 parsnip, peeled and chopped
  • 2 large sweet potatoes, peeled and chopped
  • 1/2 tbsp caster sugar
  • 1/2 tbsp tomato puree
  • Chopped coriander to garnish (if you have it lying around, or can use it up. It makes a lovely addition to the flavour as well.)
  • Rice to serve
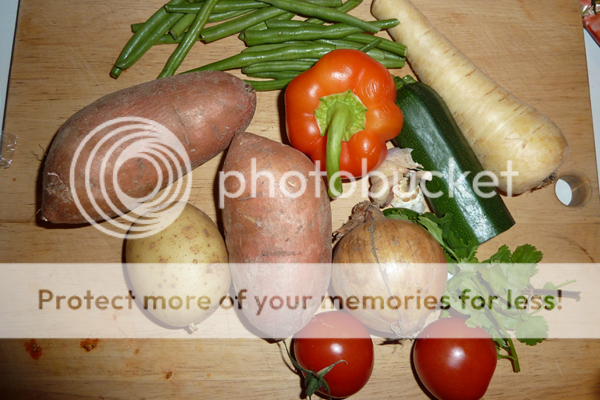
The original recipe insists you have all your veg prepared before you start, but with each chucking of veg into the pan, you have to wait five minutes for it to cook. If you feel confident at chopping, just chop as you go. Otherwise you can be prepared. It's up to you. This takes about 45m on the hob, followed by about 30m in the oven, so do bear in mind.
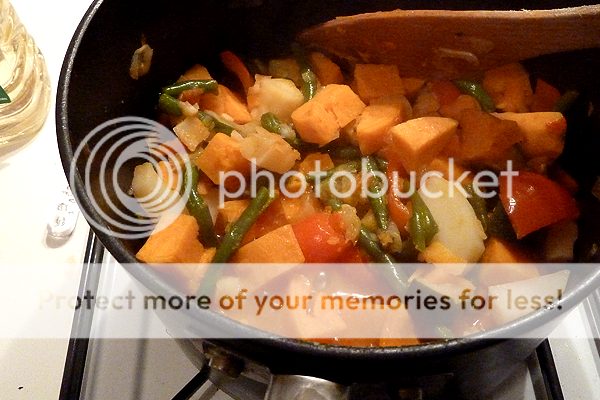
After adding the water and before leaving to simmer for 30m
Chop your onion and add to a pan on a medium hot heat with 40ml or so of the oil, and fry for 5 minutes. Meanwhile, chop your chilli and pepper, and slice the garlic, then add to the pan. Give it a good stir, then leave to fry for another 5 minutes. After the time has elapsed, add the parsnip (and if you are using butternut squash here instead of sweet potato, add at the same time.)

In order to make sure everything is cooked properly, five minutes after the parsnip (and squash) go into the pot, you want to carefully lift the veg out with a spatula or slotted spoon and put in a bowl, leaving behind as much oil as possible. Throw in your reserved 20ml of sunflower oil, then put the courgette, sweet potato, and beans into the pot. Let cook for 5 minutes, stirring on a high heat - the sweet potato is lovely if it gets a tiny bit brown round the edges -  then chuck the contents of the bowl on the side into the pot and mix all together. Lovely.

Put the tomato puree and sugar in, mix as throughly as you can, then add about 100ml of water, or however much it takes to come half-way up the side of the veg in the pot. Don't cover it by any means. Put the lid on, turn down the heat and leave it for 30 minutes. 

Bearing in mind you want to put your rice on at some point (I have a rice cooker - well worth getting - so I just stick mine on now and it keeps warm), carefully spoon out the veg from the pot into a roasting tin and then pour any remaining liquid over, although I seldom have any. Season damn well with salt and pepper, then into the oven for another 25-30m.
When you're done, the vegetables will be soft and smell delicious, and there'll be no liquid, and it will taste absolutely amazing. Put coriander on top. Yum yum. Happy January everyone.

Credit where credit is due: Yotam Ottolenghi's 'Plenty'

Monday, 20 December 2010

Spicy tofu sambal

I have so many friends who are confirmed carnivores. They relish the idea of a rare slab of steak, all bloody and meaty and succulent. The natural antithesis to this is of course tofu. The reactions some people have to this pretty innocous ingredient can be pretty negative. Of course, it doesn't exactly scream appetising. White, wobbly and jelly-like out the packet, and purportedly without flavour, tofu is sometimes viewed as the premise of hippies and weird vegetarians among many of my peers. Although, I have convinced a few to try it! It's just damn good stuff. And it doesn't taste like rubber, I swear!

In any case, it's been bloody snowy in London recently (and my flight home to Ireland on Thursday hangs in the balance of the weather, argh!) and this spicy, hot African-inspired dish really hits the spot. Made by reducing tomatoes down, with a spicy kick, onions garlic and my favourite spice, ginger, served with tofu soaked in soy sauce then fried alongside some green beans stirfried in chilli and garlic. How does that not sound amazing? This is probably my most favourite dish to eat out of everything I can cook, to be honest. It's gotten to the point where I have to try to stop myself from eating the salty umame goodness of the tofu as I marinade it. Also, the beans that go with this dish are absolutely goddamned incredible. The first time I had them, it was a revelation.

Ah, lovely tofu. You're not so bad.
The secret ingredient in this - and in the name - is Sambal, or Sambal Oelek to be precise. This is where the fact that my boyfriend is Dutch comes into play. A lot of Dutch cooking has a strong Indonesian flavour backgrounding it, for obvious reasons. So wen we go to the Netherlands, Sambal Oelek paste and Kejap Manis (a sweet Indonesian soy sauce) are two things I always try to stock up on if we are low at home. In the meantime though, some kind of chilli sauce - not sweet chilli sauce, though - will do the trick. 
Sorry about the gloves, it's really cold in my house at the moment.
As with almost everything, this is good for two hungry people.
Spicy tofu sambal with garlic and chilli green beans
  • One pack of tofu 
  • Soy sauce
  • 4 tbsp sunflower oil
  • 1 onion, finely chopped
  • 4 or 5 large tomatoes (ripe and cut into chunks) or a 400g tin of chopped/plum tomatoes
  • Good pinch of rock salt (1/2 a tsp)
  • 2 fat cloves of garlic
  • 1 tsp ground ginger
  • 2 tsp light brown sugar
  • 1 tbsp Sambal Oelek or chilli sauce/paste
  • 1 tbsp tomato puree
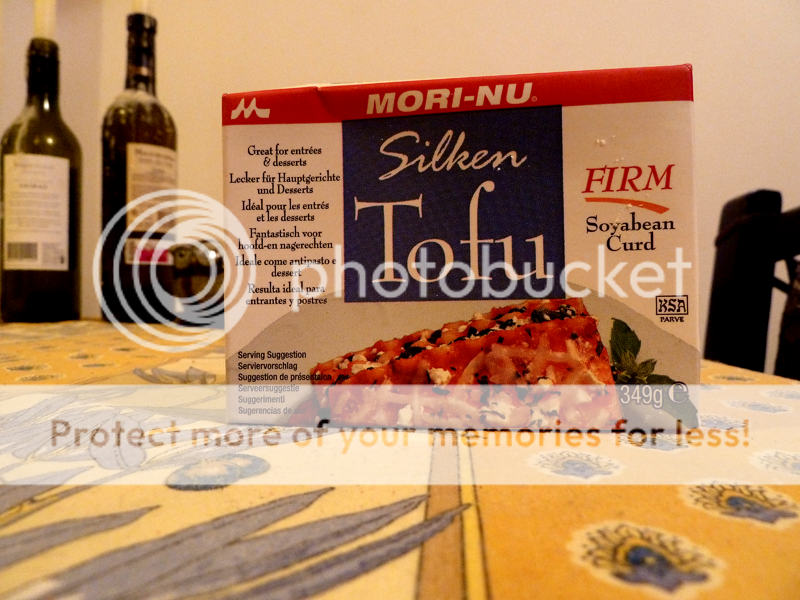
First things first, you always want to press the tofu or it might just end up falling-aparty and watery and will put you off for life. Take the tofu out of its box (it looks like this in our local supermarket), wrap it in a single sheet of kitchen roll, and put on a plate or in a shallow bowl. Put two dinner plates on top for at least half an hour - this will gradually press the water out of the tofu. Next, drain the water, and cut into 8 chunks, then marinade in a few glugs of soy sauce. You may want to turn your pieces over half way through to ensure nice coverage but it won't matter.
In your biggest non-stick pot (or separately, in a small non-stick frying pan but do remember to add the oil back into your main pot), fry the tofu - but leaving the soy sauce marinade behind, don't chuck it all in! -  in the sunflower oil until brown on all sides, then take out and set to drain on kitchen paper, leaving behind as much sunflower oil as you can. 
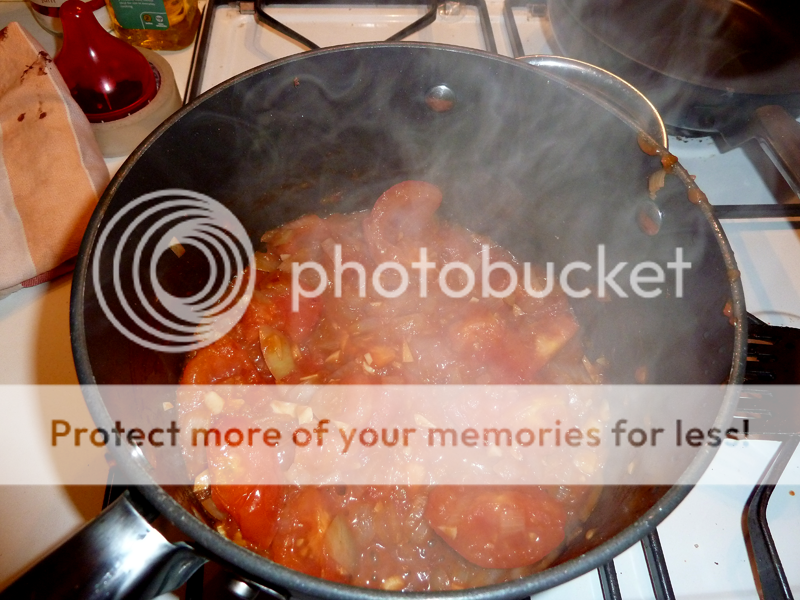
Now add your onion and give it a good stir, and let it fry on a medium heat for about five minutes, until it's approaching a soft state. Then add your ginger and chopped or crushed garlic. Mix throughly, then add the chill paste, tomato puree, and sugar. Give it a really good mix, then add salt, and your tomatoes. If it's out the can, no worries, just throw it in. Otherwise, add your tomatoes and 80ml or so of water. You want to bring this up to the boil, then lower so that the tomatoes break down and turn into a sauce, but chunkiness is good. If you're not using a rice cooker, you might want to start thinking about putting your rice on now. After 10 minutes, or however long you want to leave it, you can reintroduce the tofu off the plate into the pot, which will heat it up again.


Chilli green beans
  • 2 cloves of garlic, crushed or chopped finely
  • 1/2 a red chilli, chopped as finely as possible
  • 120 - 160g of fine green beans (trimmed, if not already)
  • 1 - 2 tbsp of soy sauce
Add a good glug of olive oil to a frying pan - nonstick is best otherwise you're asking for sticky garlic burned to your pan - and let it heat up. Then throw in all the beans, toss them so they get a nice even coating of olive oil, and let them sizzle away for a bit until they start to get some colour and soften up, a few minutes maybe. 
Put your garlic in and mix it through, then QUICKLY add the soy sauce, or it'll burn. I don't usually pay much attention to how much soy sauce, I know a 'glug' is woefully inaccurate amount but that's usually what I do. Or two glugs. Hah.

Then add the chilli and stir until everything is soft and tasty, and darkened. Try one of the beans and make sure that its not deceptively done-looking on the outside but still too crunchy on the inside. The contrast between the salty, garlicy greens and the sweet, spicy tofu sambal is quite amazing, and well worth the extra effort. Serve with rice.

Wednesday, 15 December 2010

Shakshouka (eggs poached in spicy sauce)


Ah Shakshouka, how I love thee. So delicious, cheap and veggie, healthy and spicy and hot and warming on a damp, freezing cold night, shakshouka is one of our regular dinners. This is a fairly bastardised version of the probably much more traditional versions online, but I find this recipe does just the job for me. It also great for using up the bits and pieces out of the fridge, is high in protein and so immensely soothing to eat, like a big bowl of soup full of veg and spices and gloriously yolky-and-runny poached eggs. This is cobbled together from a few recipes and is kind of a vegetable-rich (and therefore better) version of Uova in Purgatorio, in my opinion. Again, Middle Eastern-inspired food makes great and flavoursome vegetarian food without skimping on the all-important protein.
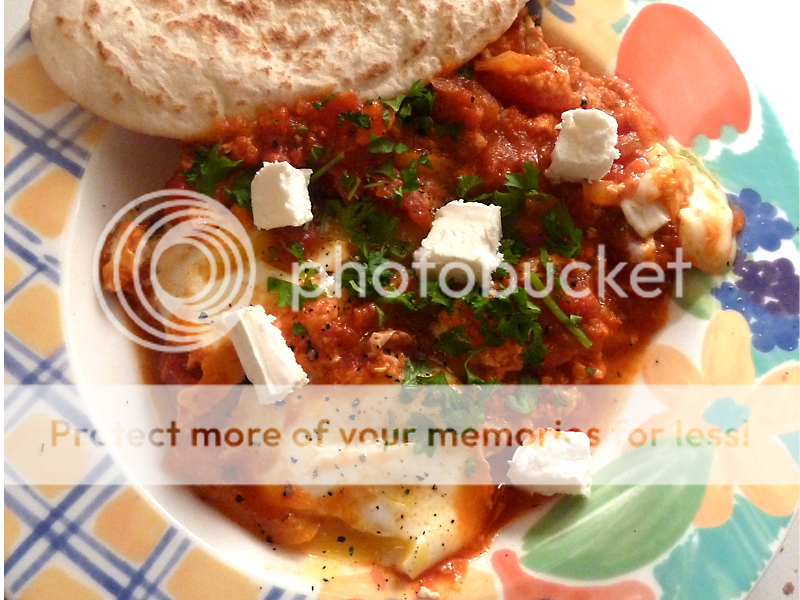
Plus, look at ridiculously gorgeous it is. All that red and yellow! Mm. Makes enough for two very greedy people. 


Shakshouka 
  • 4 tbsp (1/4 of a cup) olive oil
  • 4 eggs
  • 1 400g tin of plum or chopped tomatoes
  • 2 peppers (green and yellow are nice)
  • 1/2 a white onion, diced
  • 1 red chilli pepper
  • 3 or 4 cloves of garlic, crushed
  • 1 tbsp ground cumin, chopped
  • 1 tbsp paprika (use smoked if you have it) 
  • Handful of chopped parsley
  • Handful of crumbled feta (in the above picture, I've used a bit of goat's cheese as an experiment, as we had no feta.. it was nice!)
  • Hummus to serve, if you have it, and some toasted pita to scoop up the last bits. 


You might cringe a bit at adding spoonful after spoonful of olive oil, but I urge you not to skimp on it, the veg need to soften and stew slightly, and the olive oil will help bring out the flavour so wonderfully. Heat the oil, and add the chilli pepper, the diced peppers, and the onion and stir over a medium-low heat until softening, around six minutes.
Add the garlic, cumin and paprika - feel free to chuck in more spices as you like, I like things stronger tasting than this recipe -and give it a quick stir for two minutes. By now the smell should be absolutely gorgeous.


 If you're using plum tomatoes, tip the tin's worth into a bowl and use your hand to crush them up, otherwise just into the bowl with 4 tbsp (1/4 of a cup) of water. Heat up to boiling point, then reduce the heat to medium and leave to thicken.
 Give it at least 5 minutes - the original recipe recommends about 15! But see how thick it's getting. You probably don't want it to reduce down to nothing, it's nice to have a bit of runny sloppiness in a dish like this. Add a good sprinkle of salt and use the back of a wooden spoon to make four indentations in four corners of the sauce and carefully break an egg into each indentation. 


Put the lid on and give it about three to five minutes, until the white has set and the yolk has juuuuust cooked. Again, you don't want anything over-cooked or thickened here. 
Right before it's time to eat, sprinkle over your parsley, and feta, and try to skilfully slop out of the pan with a wide spoon into a pasta bowl so it still looks pretty. Pita and hummus are lovely with this. 
Credit where credit is due: inspired/modified from Smitten Kitchen

Saturday, 11 December 2010

Quick, easy falafel

I love falafel - it's tasty, substantial and technically counts as one of your five a day as it's made from chickpeas (which is like 60p a can) and a whole lot of spices. It also keeps great in the fridge, so any that you have left over can be thrown into a salad or eating with some pita and hummus the next day.
Although this doesn't have the fast-food appeal of something that's been deep fried (indeed, what does), it's really easy to throw a load of stuff you might have sitting in your fridge - a tomato, a bit of bagged salad, Greek yoghurt - and make a spread which is really impressive. And it takes about 20 minutes from start to finish, or even less.
The golden rule here I think is that in my opinion it's very hard to over season. The original recipe I got this from used a tablespoon of cumin, and that was all. You can probably double or triple this - I just throw a fair whack in. 


The only thing you might have trouble finding is Harissa spice, a Moroccan chilli-and-rose paste which goes great in Middle Eastern cooking. This recipe is fine without it as well, of course (I can't stand recipes that hinge on you being able to find pomegranate molasses, etc.) If you can find one though, or even one of those supermarket 'rubs' which you're supposed to smear over a chicken, throw it in by all means.
This makes enough for two people comfortably... 


Easy falafel 
  • 400g can of chickpeas 
  • 1/2 a red onion
  • Three or four cloves of garlic
  • Handful of fresh parsley
  • 2 tbsp ground cumin
  • 1 tbsp of smoked paprika (if you have it)
  • 2 tbsp dried coriander 
  • Pinch of chilli flakes (if you want a little heat)
  • 1 tbp harissa paste
  • 4 - 8 tbsp flour
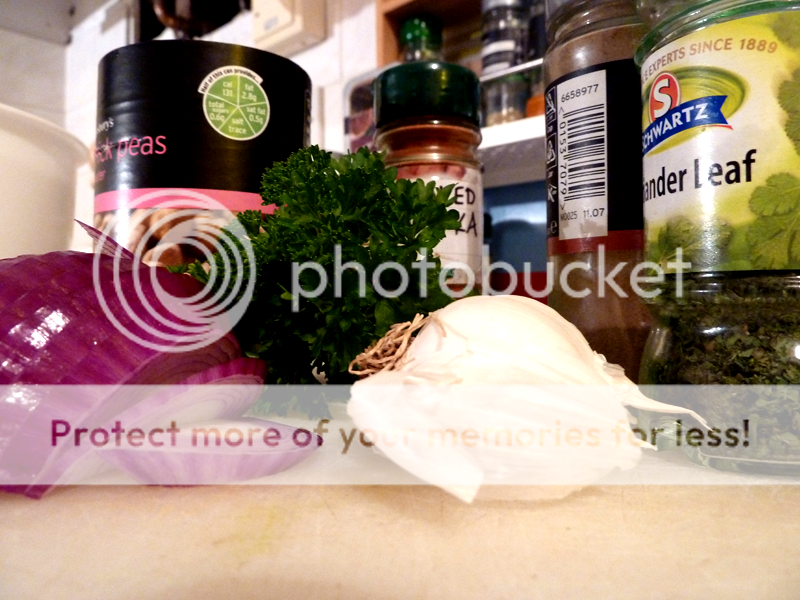
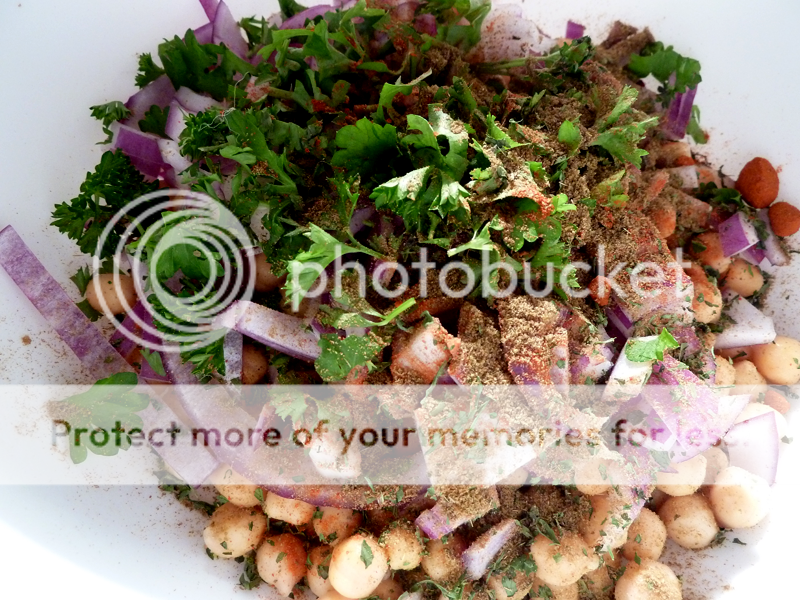
Drain the chickpeas before you start anything else, and give them a rinse in the colander, then dry off a bit with some kitchen towel and leave to sit for a bit, to dry a bit more. Meanwhile, chop your red onion half fairly finely, chuck it in a bowl. Do the same with the parsley, and garlic, add to the bowl, along with the spices, and the harissa (not the flour yet.)


Use either a food processor or a hand-held blender (I got mine for £3.99 from Sainsburys and it does the job nicely) to mash it all into a fairly consistent paste. Don't worry about getting ALL the chickpeas mashed up, just most of them. 


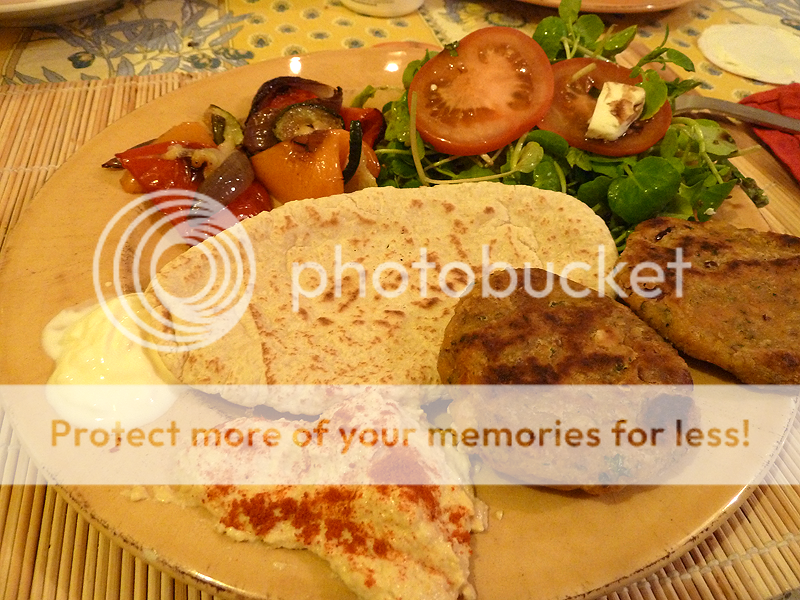
Start adding your flour, mixing through with a wooden spoon - I find you need way more than you will think. Basically you want to add enough so that it's still sticky, but not so impossibly sticky that you can't pick it up. You want to mould them into burger-shapes (my boyfriend insists that round ones taste better - but this is because you have that shape when they're deep fried! Burger-shaped is the best way to go.)  You're going to want to dust your hands with flour when picking up little handfuls.Put them to one side, then fry, or just add straight to a medium-hot frying pan as you go, with a good glug of olive oil, fry until crispy and brown on both sides then serve with pita, hummus (sprinkled with smoked paprika like in the picture is lovely), and anything else you can find/be bothered with! Rocket salad, chopped tomato, feta, couscous, roasted vegetables, etc - it's all good. 

Addendum: I tried making this from 'real', untinned chickpeas once which needed to be soaked, boiled, etc, and the end result was so disappointing and the effort needed so much more that I really don't think I'll be trying that again... 


Credit where credit is due: inspired/modified from the BBC

Friday, 10 December 2010

Sage roast chicken and sausage with mustard and lemon


It's no secret that I love making roasts for people. There is nothing quite so lovely as having a few friends quietly milling around your house midday, wine in hand, as all kinds of delicious smells waft from the oven and you're peacefully peeling spuds and all the rest. Only sometimes buying a huge chicken or such can be a bit of a mission when you were hoping for something a bit more downbeat.

This Nigella Lawson recipe is a 
lovely balance of that - delicious, but extremely straightforward and a perfect medium if you haven't quite gotten around to trying a proper roast yet. No basting required, just slam in the oven and take out an hour and 15 later (although do turn the sausages over once). It's also cheap!  - using sausages and chicken thighs, which turn crispy on the outside and perfectly tender in the middle. The sage used gives it a wonderful, hearty aroma and the marinade pushes it from just being 'roast meat' into something seriously delicious. You can have it with just some basic mashed potato and veg on the side if you're feeling simple, or if you prefer to go full whack, a potato gratin and some peas and carrots make it into something that rivals a full on Sunday lunch. This is just about the right amount for three people, usually our good friend  Dave, who is a long-visiting guest, regularly giving me the opportunity to justify cooking elaborate meals. The time I made this he was painfully hungover, but he ventured from Edgware to sample the food and left a happy man indeed.  
This makes enough for three as that's the size of my roasting tray, with a few bits left over, but just straight up double if you want to do enough for six. I have this in my recipe notes as 'one tray amazing roast heaven' but lets call it... 


Halfway through eating, realised I hadn't taken a photo! So this is a bit blurry and hurried....
Simple, one tray roast 
  • 1 or 2 small onion (the marinaded, slippery onions that result from this recipe are amazing)
  • 60ml olive oil
  • 1 tsp mustard (the original recipe calls for English but I prefer French grainy mustard)
  • 1 tbsp dried sage
  • 1/2 lemon
  • 1/2 tbsp Worcester sauce
  • 6 chicken thighs
  • 6 to 8 sausages (however many you want, really.)
  • 1 tbsp of chopped, fresh sage, if you can justify buying a whole pack for a few leaves. I normally skip this because buying fresh herbs unless I plan to use up is a waste, but it's a nice addition.
Before you start, prepare the marinade. Have a freezer bag ready, although if you are in a pinch a bowl will do, just remember to stir it around a little bit while marinading so it gets an even coating. Into your bag, put in the olive oil, the Worcester sauce and the mustard. Juice the lemon half and pour in the juice, then slice the rind into eighths and chuck that in too. Cut the onion into eighths and add to the bag, with the dried sage and a looooooot of ground black pepper. Yum. Mash it all up so it forms a consistent mixture, then add the chicken, make sure it gets coated then marinade for as long as you can stand. An hour, four hours, over night, whatever. Just make sure the chicken isn't cold when you start roasting, if possible.

Put the oven to 220, (although 200 is usually what I do as our oven is hot) and tip the whole bag/bowl of marinade into your largest and nicest roasting tray. Put the chicken in the tray skin-side up, and tuck the sausages around. Add the fresh sage if you're using it - a tablespoon of chopped leaves - and that's it. Put it in the oven and cook for one hour to one hour fifteen. At the 45m mark, take it out, and flip the sausages, as the underside will be white and the top will be brown and crispy. 

Pro-tip: I would remove the lemon before serving up, as if you don't you might end up accidentally trying to eat a chunk of it a la onions. 

Credit where credit is due: Nigella Lawson 
Related Posts Plugin for WordPress, Blogger...